
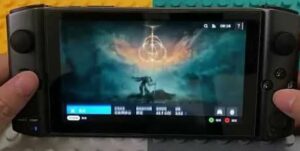
Steam Deck revolutionized the landscape of handheld gaming by presenting a blend of its cutting-edge features when it was launched by Valve Corporation. Operating on a tailored Linux variant identified as SteamOS, the Steam Deck delivers a distinctive gaming environment. Although SteamOS is commendable, its innovative character has led to the oversight of certain features, necessitating user customization. Among these features is the console’s ability to customize and mount ISO files. This capability significantly elevates the gaming experience, providing access to a broader spectrum of games and software. In this comprehensive guide we will explore the step-by-step process of successfully mounting an ISO file on your Steam Deck. Let’s find how to mount ISO files on Steam Deck portable gaming console.
What are ISO Files
An ISO file is a standalone compressed file that serves as a digital replica of a CD, DVD, or Blu-ray disc, offering an efficient means of distributing large files like software and games. By mounting an ISO, users can access its contents as if utilizing a physical disc.
Benefits of Mounting ISO on Steam Deck
Mounting an ISO on your Steam Deck brings forth numerous advantages. Firstly, it gives you access to all the data present in that file. This enables you to play legacy games that may not be available on digital platforms. Moreover, this method eliminates the need for physical discs, augmenting the portability of your gaming library. Additionally, using ISO files as backups aids in preserving the integrity of your original discs.
How to Mount ISO files on Steam Deck
Step 1: Update Your Steam Deck
Ensure that your Steam Deck is running on the latest firmware. This update is crucial for ensuring compatibility and security when handling ISO files.
Step 2: Transfer the ISO File
Connect your Steam Deck to a computer or employ a USB drive to transfer the ISO file. Remember to place it in a directory that is easily accessible.
Step 3: Install Mounting Software
Mounting the ISO file necessitates specific software. ‘Daemon Tools’ stands out as a popular choice due to its compatibility with the Steam Deck. Install this software through the device’s Linux desktop mode.
Step 4: Mount the ISO File
Initiate ‘Daemon Tools’ on your Steam Deck.
Locate the directory where your ISO file is stored.
Select the file and choose to mount it. The software will create a virtual drive that the Steam Deck recognizes as a physical disc.
Step 5: Access and Play
Once the ISO is mounted, you can access the file from the Steam Deck’s game library or file manager. Now, you’re all set to enjoy your game or software, as if it were running from a physical disc.
Additional Tips for Success
Ensure there is sufficient storage space on your Steam Deck for the ISO file.
Some older games might require additional steps or software for compatibility.
Only mount ISO files that you legally own.
Conclusion
Mounting an ISO on the Steam Deck is a straightforward and simple process. These above-mentioned steps empower users to unlock a new level of versatility in gaming, enabling them to enjoy a wider array of games and software on their portable gaming console.
Frequently Asked Questions
Q1: Can I mount multiple ISO files at once?
A: Yes, it’s possible to mount several files, each requiring its virtual drive.
Q2: Will mounting an ISO void my Steam Deck’s warranty?
A: Mounting an ISO is safe and does not affect your warranty.
Q3: Are there any size limitations for ISO files I can mount?
A: The only limit is the available storage space on your Steam Deck.
Also Read:
How to fix the Steam Deck cloud sync error?
Which Steam Deck Should You Buy?


